一、项目背景
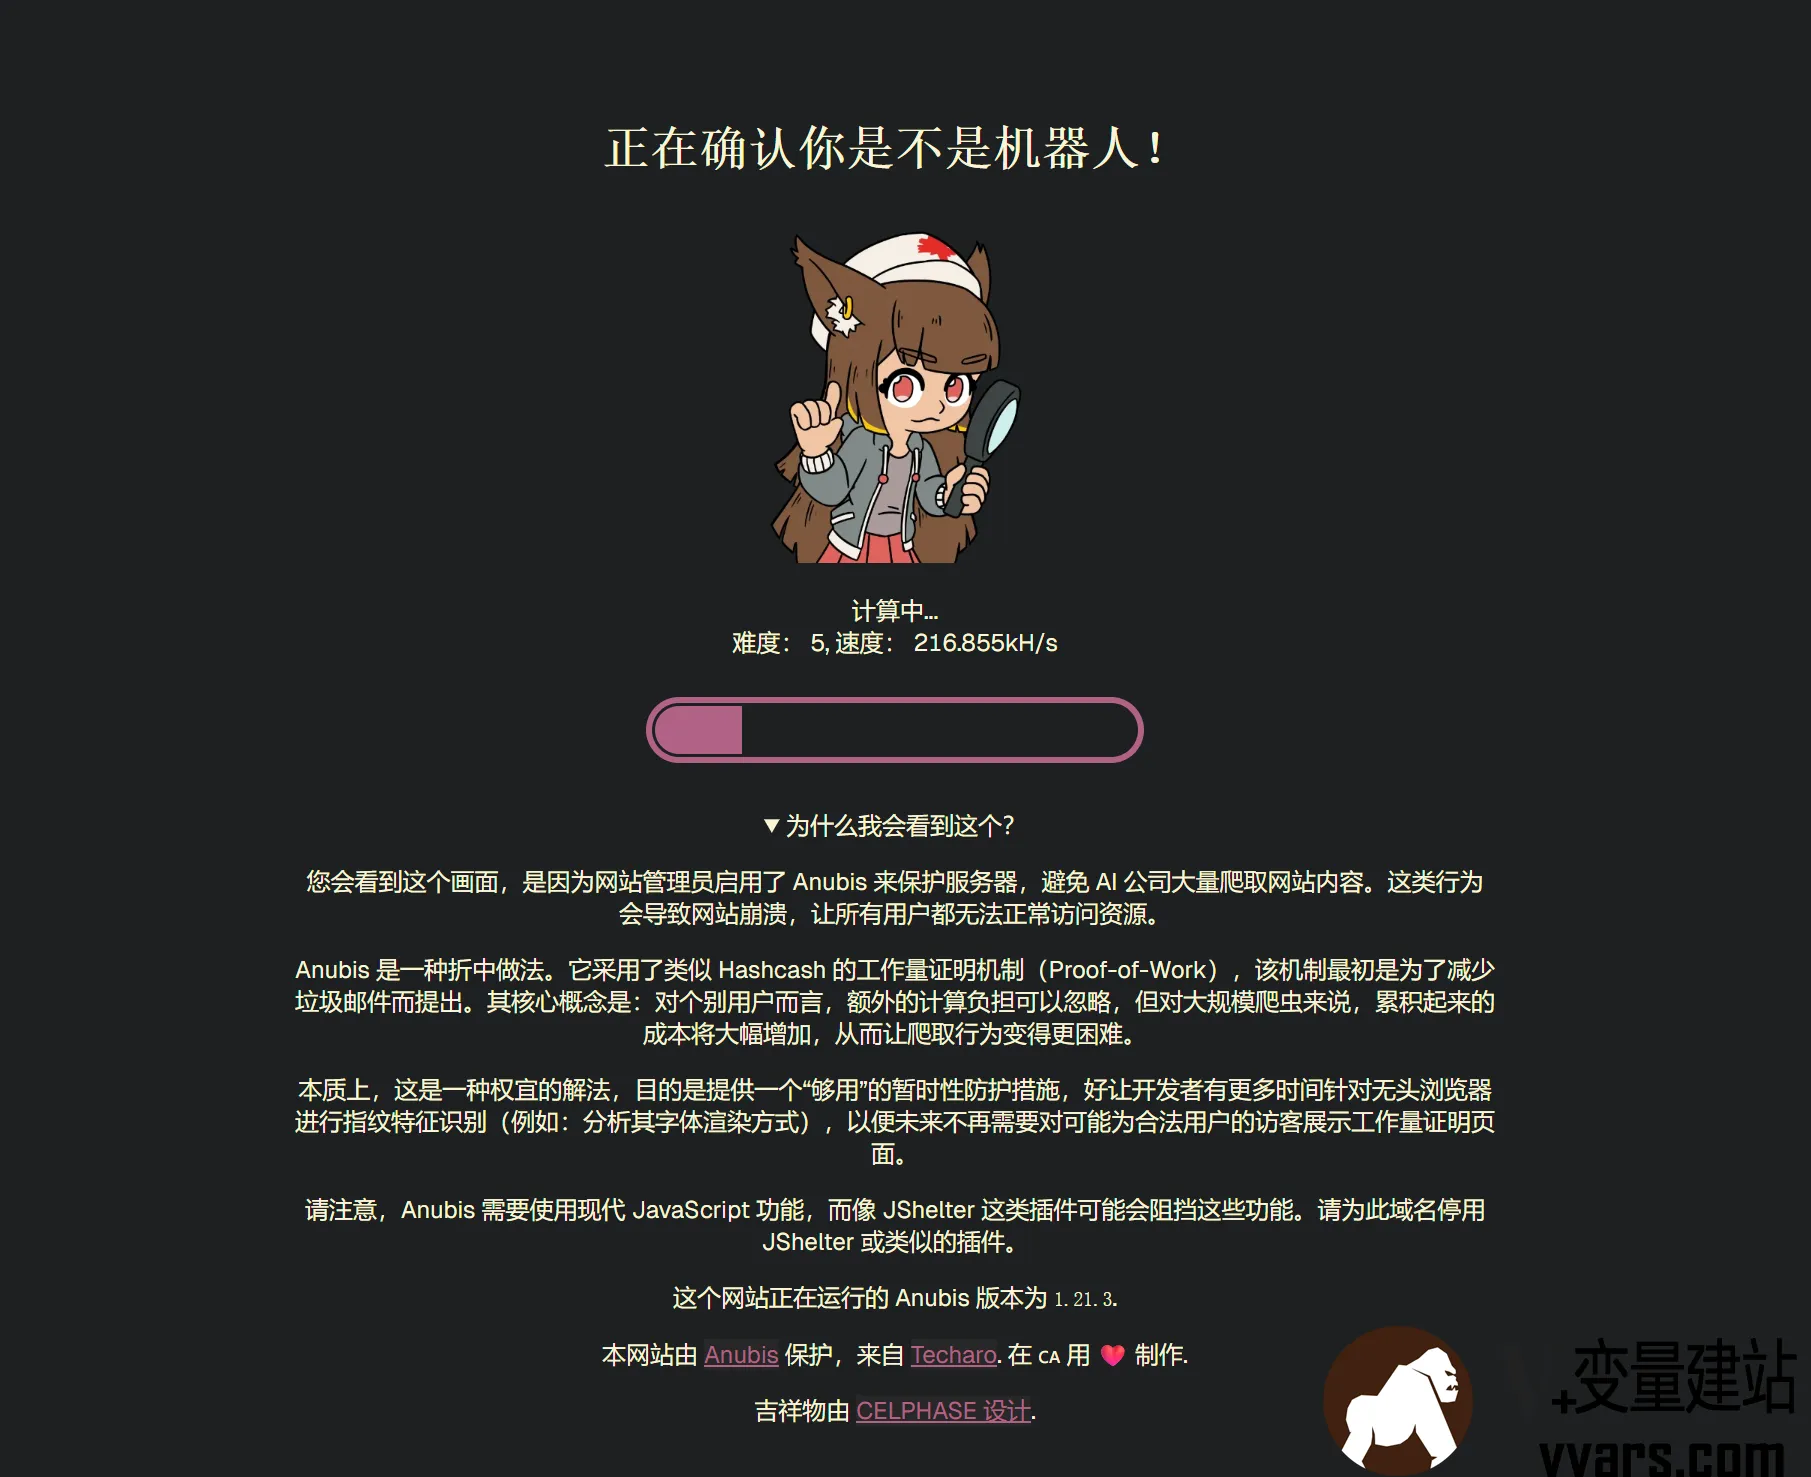
Anubis工作模式类似于Cloudflare的Javascript挑战,拦截请求之后,用户需要通过挑战之后才能继续访问。
而Anubis需要客户端完成一定难度的Hash计算,简单说就是挖矿。
客户端需要进行一定负载的计算,计算出正确结果之后才能进入网站。
这对于正常用户的客户端来说并不算是什么,在难度2-4下,大概率计算时间小于2秒钟,一闪而过用户感知小。
在难度5-6时,浏览器需要进行10-30秒以上的计算。
在CC攻击的时候,攻击者会控制大量的无头浏览器进行攻击,使用Anubis之后,会在攻击者的无头浏览器中执行Hash计算,高难度的Hash计算会拖垮攻击者的服务器,从而降低攻击频率。
项目官网
我在本地Debian12 + NGINX系统中已经跑通,随后我会发表一篇博客详细描述配置
PS;Anubis有非常强大的功能,包括针对不用GEOIP、不同AS的规则,正在进一步探索中。
PPS;试了下难度设置为6,大概1分钟才计算完成,期间CPU(i5-13490H)占用80%左右。
二、工作原理
1 Anubis
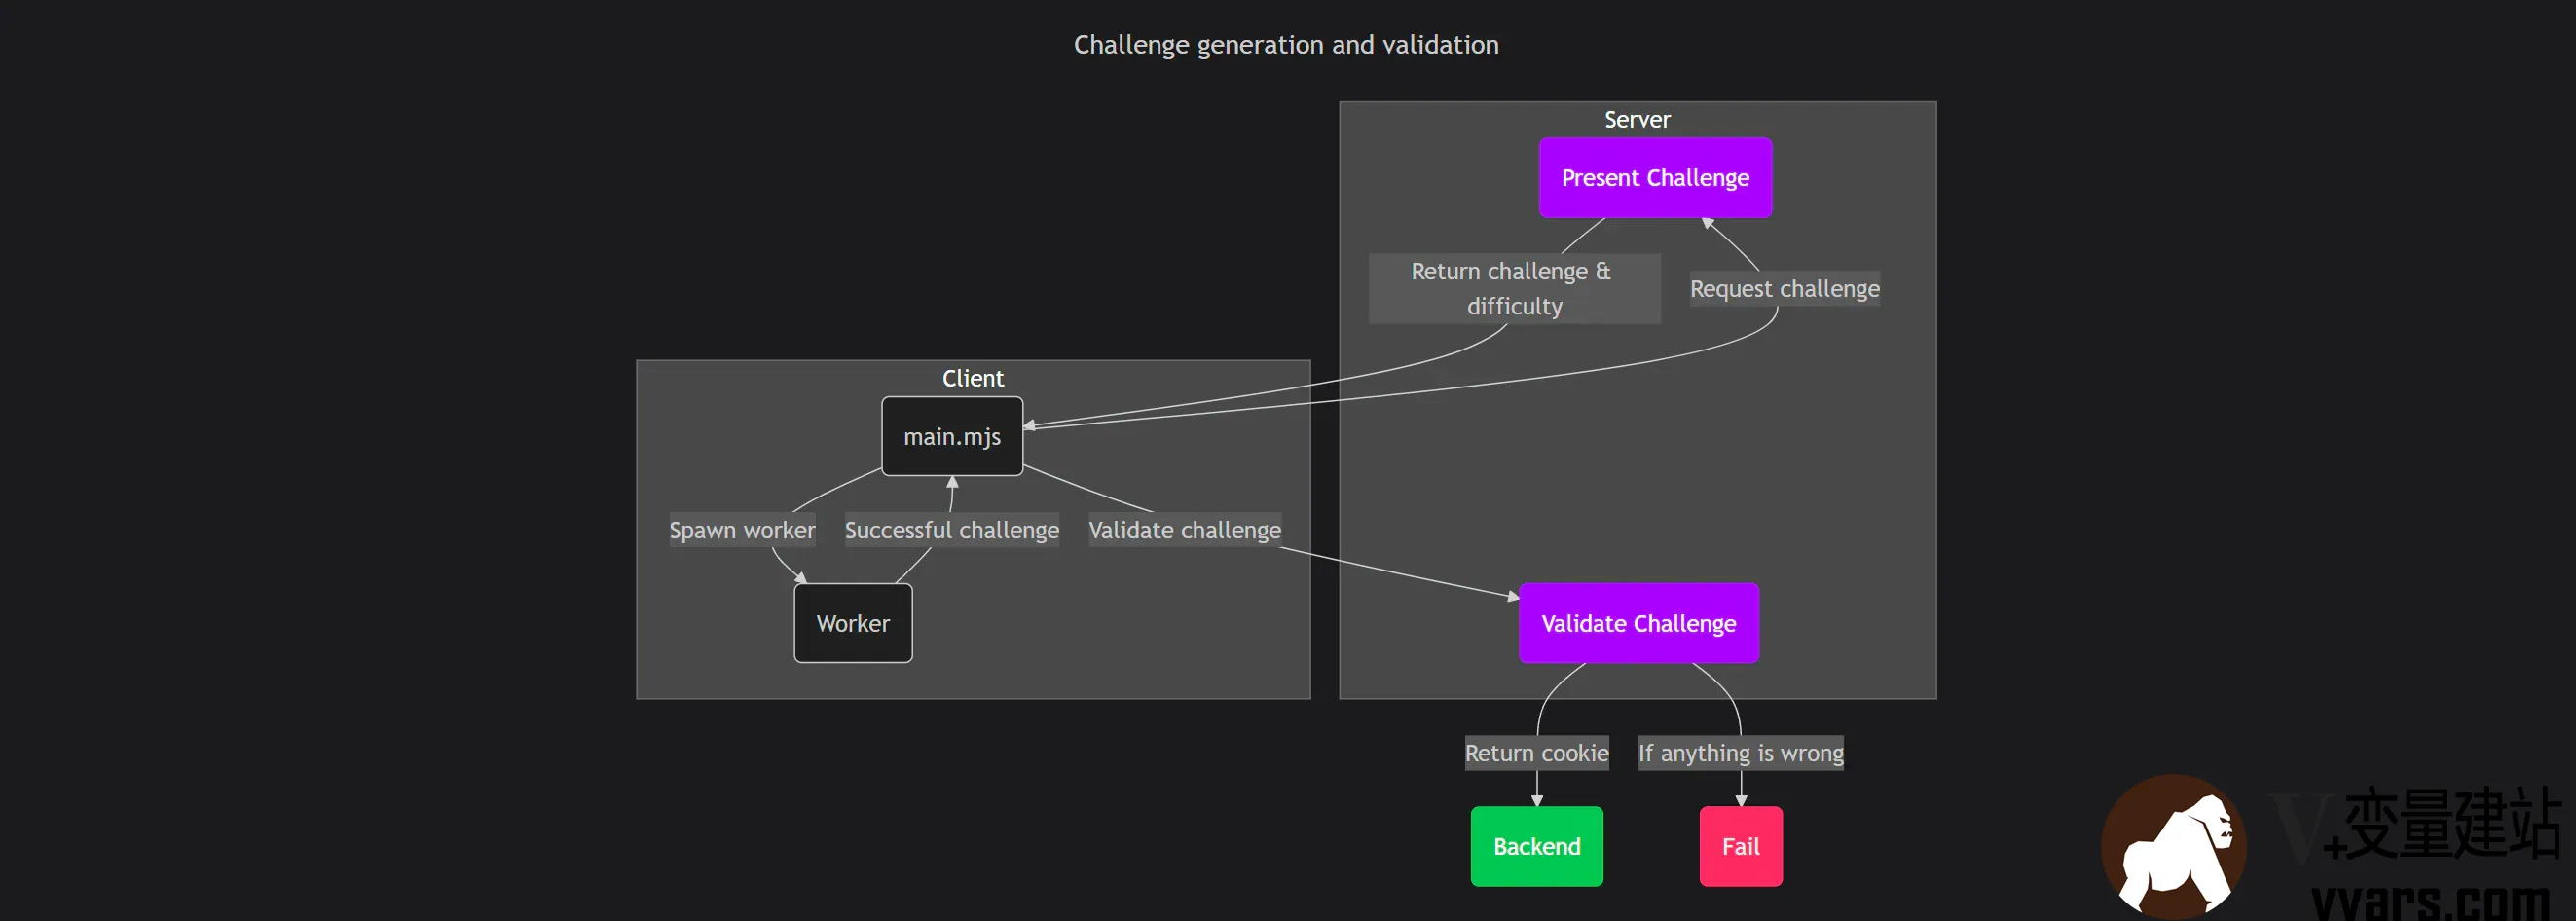
Anubis是一个网站防护工具,其工作原理类似常见的Cloudflare验证,会在用户进入网站之前对客户端进行检查。客户端需要完成一定难度的Hash计算,服务器验证计算结果后放行,Hash计算代表了客户端可能需要执行几千几万次的计算,而服务器验证执行执行一次,对服务器开销小。
当有网络爬虫、CC攻击想进入源站是,需要在攻击者的客户端(比如无头浏览器中)进行一定量的Hash计算,攻击者一般会在一台物理机中运行多个配置了代理的无头浏览器,这些Hash计算会拖垮攻击者的服务器,从而迫使攻击者放弃或减低攻击频率。
现代设备通常都具有一定的限制算力,这些任务对于这些客户端来说,通常只需要几毫秒或几秒中即可完成,用户只需要等待一段时间,不需要进行任何操作,成功后会自动进入实际后端服务。
2.工作原理
Hash计算
和经典的比特币挖矿一致,客户端需要使用一个确定的字符串加上任意数字,进行 sha256 计算,得到的 64 为hash值的前x个数为 0,x就是difficulty
const hash = await sha256(`${challenge}${nonce}`);整体流程

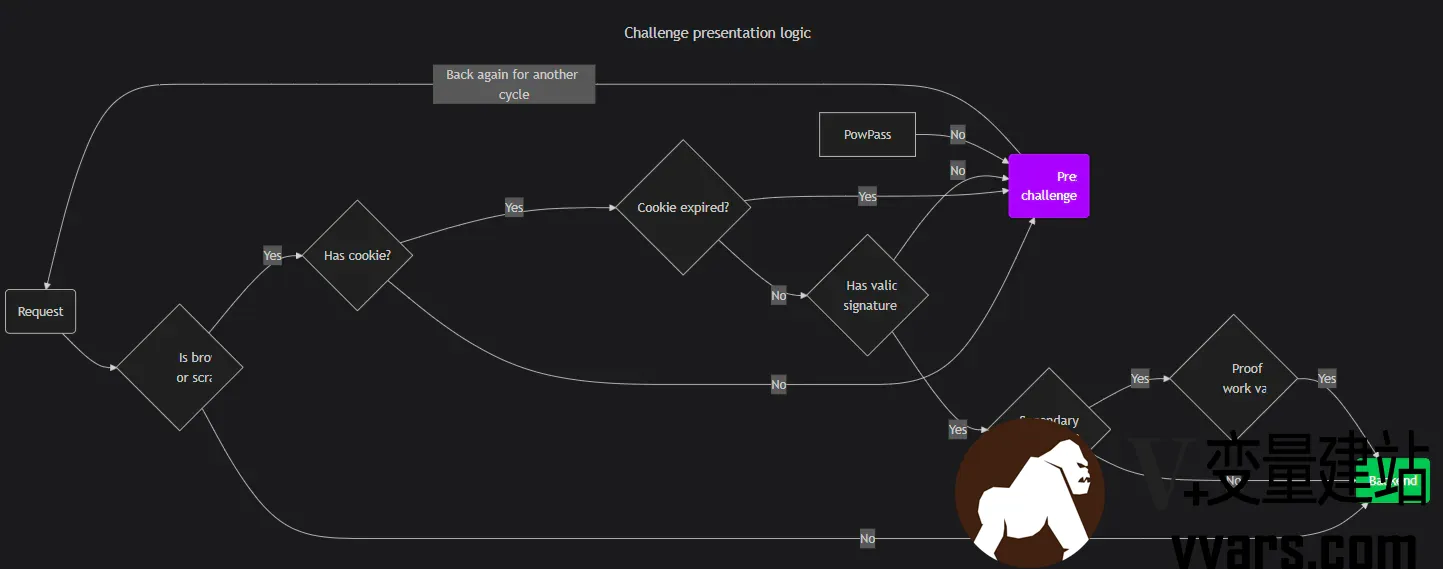
客户端第一次访问时,会根据访问者的IP、ASN、User-Agent,服务器的工作负载,计算出一个数值 weight,之后通过 weight 匹配不同难度的Hash计算任务给客户端。客户端完成计算后,由服务器进行验证,成功之后放行到真正的后端服务,同时返回 Set-Cookies 以保存一段时间验证结果,当用户下次访问时,可复用上次的验证结果。
3.与NGINX搭配
![[Pasted image 20250821210211.png]]
流量从 80/443 端口进入之后,先交给Anubis进行拦截,延迟完成之后在交还回NGINX进行后续流程。在单个服务器内通过unix socks进行交互。
三、安装/配置教程
此处以Debian 12 系统为例
1 安装Anubis
1)下载并安装
(1)请在Github获取最新的版本号
wget -O /tmp/anubis.deb https://github.com/TecharoHQ/anubis/releases/download/v1.21.3/anubis_1.21.3_amd64.deb && apt install /tmp/anubis.deb(2)不能直连Github,可以使用加速域名,或者手动下载上传到服务器
wget -O /tmp/anubis.deb https://ghfast.top/https://github.com/TecharoHQ/anubis/releases/download/v1.21.3/anubis_1.21.3_amd64.deb && apt install /tmp/anubis.deb(3)修改 /etc/anubis/default.env,内容如下
BIND=/run/anubis/instance.sock
BIND_NETWORK=unix
SOCKET_MODE=0666
TARGET=unix:///run/nginx/nginx.sock
(4)复制默认策略文件,暂不修改
cp /usr/share/doc/anubis/botPolicies.yaml /etc/anubis/botPolicies.yaml2)systemd运行
(1)创建service文件
vi /etc/systemd/system/anubis.service[Unit]
Description=Anubis Bot Protection
After=network.target
[Service]
EnvironmentFile=/etc/anubis/default.env
ExecStart=/usr/bin/anubis \
-bind /run/anubis/instance.sock \
-bind-network unix \
-socket-mode 0666 \
-target unix:///run/nginx/nginx.sock \
-metrics-bind 127.0.0.1:9091 \
-metrics-bind-network tcp \
-policy-fname /etc/anubis/botPolicies.yaml
Restart=always
User=www-data
Group=www-data
[Install]
WantedBy=multi-user.target(2)创建目录
mkdir -p /run/anubis /run/nginx(3)修改权限
此处的用户和NGINX相同
chown www-data:www-data /run/anubis /run/nginx(4)启用Anubis
systemctl enable --now anubis.service(5)确保已经成功运行
systemctl status anubis2 配置NGINX
此处提供一份可用NGINX,请自行修改扩展
user  root;
worker_processes auto;
pid /run/nginx.pid;

events {
    worker_connections 1024;
}

http {
    upstream anubis {
        server unix:/run/anubis/instance.sock;
    }

    server {
        listen 443 ssl http2;
        server_name uptime.vio.vin;

        ssl_certificate     /etc/ssl/violet/certs/all.vio.vin.cert.pem;
        ssl_certificate_key /etc/ssl/violet/certs/all.vio.vin.key.pem;

        location / {
            proxy_set_header Host $host;
            proxy_set_header X-Real-IP $remote_addr;
            proxy_pass http://anubis;
        }
    }

    server {
        listen unix:/run/nginx/nginx.sock;
        server_name uptime.vio.vin;

        location / {
            proxy_pass http://10.115.15.178:3001;
            proxy_set_header Host $host;
            proxy_set_header X-Real-IP $remote_addr;
        }
    }
}
upstream:定义上游服务器为anubis
第一个server:监听 443 入站连接,传输给anubis,传输客户端IP用于IP相关策略判断
第二个server:anubis验证通过之后,实际反向代理的位置
至此,基础配置已完成,默认情况下低分析客户端难度为 2,高风险为 4
3 Bot策略
官网文档:https://anubis.techaro.lol/docs/admin/policies
需要调整 botPolicies.yaml 文件
默认的botPolicies.yaml 配置文件:https://github.com/TecharoHQ/anubis/blob/main/data/botPolicies.yaml
bots中定义了多个规则,可以看到已经通过import导入了一部分规则,这部分的文件可以在 /usr/share/doc/anubis/data/bots 中找到
默认的规则如下,可以仿照这些规则写自己的规则
1)可配置匹配规则
(1)匹配请求头
/usr/share/doc/anubis/data/bots/cloudflare-workers.yaml- name: cloudflare-workers
headers_regex:
CF-Worker: .*
action: WEIGH
weight:
adjust: 15(2)匹配User-Agent
/usr/share/doc/anubis/data/bots/headless-browsers.yaml- name: lightpanda
user_agent_regex: ^LightPanda/.*$
action: DENY
- name: headless-chrome
user_agent_regex: HeadlessChrome
action: DENY
- name: headless-chromium
user_agent_regex: HeadlessChromium
action: DENY(3)指定表达式
/usr/share/doc/anubis/data/bots/aggressive-brazilian-scrapers.yaml- name: deny-aggressive-brazilian-scrapers
action: WEIGH
weight:
adjust: 20
expression:
any:
# Internet Explorer should be out of support
- userAgent.contains("MSIE")
# Trident is the Internet Explorer browser engine
- userAgent.contains("Trident")
# Opera is a fork of chrome now
- userAgent.contains("Presto")
# Windows CE is discontinued
- userAgent.contains("Windows CE")
# Windows 95 is discontinued
- userAgent.contains("Windows 95")
# Windows 98 is discontinued
- userAgent.contains("Windows 98")
# Windows 9.x is discontinued
- userAgent.contains("Win 9x")
# Amazon does not have an Alexa Toolbar.
- userAgent.contains("Alexa Toolbar")
# This is not released, even Windows 11 calls itself Windows 10
- userAgent.contains("Windows NT 11.0")
# iPods are not in common use
- userAgent.contains("iPod")(4)匹配客户端IP
/usr/share/doc/anubis/data/clients/mistral-mistralai-user.yaml# Acts on behalf of user requests
# https://docs.mistral.ai/robots/
- name: mistral-mistralai-user
user_agent_regex: MistralAI-User/.+; \+https\://docs\.mistral\.ai/robots
action: ALLOW
# https://mistral.ai/mistralai-user-ips.json
remote_addresses: [
"20.240.160.161/32",
"20.240.160.1/32",
](5)匹配GEOIP
- name: countries-with-aggressive-scrapers
  action: WEIGH
  geoip:
    countries:
      - BR
      - CN
  weight:
    adjust: 10
(6)匹配ASN
- name: aggressive-asns-without-functional-abuse-contact
  action: WEIGH
  asns:
    match:
      - 13335 # Cloudflare
      - 136907 # Huawei Cloud
      - 45102 # Alibaba Cloud
  weight:
    adjust: 10
(7)匹配后动作
动作 解释
ALLOW 允许,跳过后续所有检查
DENY 拒绝访问
CHALLENGE 进行客户端挑战
WEIGH 修改请求权重
ALLOW和DENY不再解释
2)CHALLENGE
- name: generic-bot-catchall
  user_agent_regex: (?i:bot|crawler)
  action: CHALLENGE
  challenge:
    difficulty: 16 # impossible
    report_as: 4 # lie to the operator
    algorithm: slow # intentionally waste CPU cycles and time
name:名称,可自定义
user_agent_regex:正则表达式匹配User-Agent
action:动作,立即进行客户端挑战
challenge:客户端挑战配置
difficulty:难度,16 表示计算出的hash值前 16 位为 0,不可能完成(比特币的前导 0 个数为 19-20),在客户端完成 16 为的计算可能需要几万年甚至更久(攻击者看者 99%的CPU陷入沉思)
report_as:用户在界面上看到的难度数值(你甚至可以骗他,这个进度条怎么一直卡在 99%不走呢)
algorithm:采用的Hash算法,slow故意折磨CPU
3)WEIGH
调整请求的权重,正数为增加权重,负数为减少权重,后续会进入到 thresholds 中,针对不同的请求设置不同的CHALLENGE
0-10 的权重,进行快速算法,几乎不需要等待
- name: mild-suspicion
  expression:
    all:
      - weight > 0
      - weight < 10
  action: CHALLENGE
  challenge:
    algorithm: metarefresh
    difficulty: 2
    report_as: 2
4)其他
根据服务器负载动态调整
示例在配置文件中已给出,有需要可以启用
  # ## System load based checks.
  # # If the system is under high load, add weight.
  # - name: high-load-average
  #   action: WEIGH
  #   expression: load_1m >= 10.0 # make sure to end the load comparison in a .0
  #   weight:
  #     adjust: 20

  ## If your backend service is running on the same operating system as Anubis,
  ## you can uncomment this rule to make the challenge easier when the system is
  ## under low load.
  ##
  ## If it is not, remove weight.
  # - name: low-load-average
  #   action: WEIGH
  #   expression: load_15m <= 4.0 # make sure to end the load comparison in a .0
  #   weight:
  #     adjust: -10

评论 (0)